In this post, I will show you how to control Servo Motor using MATLAB Application GUI. I will use Arduino Uno which will receive commands from MATLAB and will control the Servo Motor based on the commands received from MATLAB.
If you don't know what Arduino, MATLAB, and Servo Motor are, then I would request you guys learn the basics about MATLAB, Servo Motor, and Arduino. Basic learning of these things is required.
So let's start, for designing GUI using MATLAB we have two choices the first one is GUIDE and the other option is MATLAB Application, so for this post, I am going to use MATLAB Application and not GUIDE, as MATLAB Application has lots of instrumentation widgets available.
The Connection diagram for connecting Servo Motor to Arduino is very simple and is as follows:
As clear from the above figure Servo Motor signal pin is connected to Arduino's 8th digital pin, which will provide pulses to Servo Motor for controlling its rotation.
Servo Motor comes with three pins and the following diagram will help you identify the proper connections for your servo motor.
Program Flow:
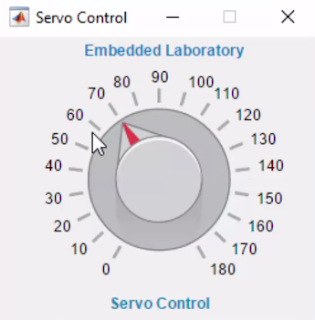
The Servo Motor which I am using can rotate from 0 degrees to 180 degrees, MATLAB Application will send these values to the serial port, based on the knob position selected by the user and Arduino Program will in-turn rotates the servo motor to the desired position.
The Arduino Program is as follows:
If you don't know what Arduino, MATLAB, and Servo Motor are, then I would request you guys learn the basics about MATLAB, Servo Motor, and Arduino. Basic learning of these things is required.
So let's start, for designing GUI using MATLAB we have two choices the first one is GUIDE and the other option is MATLAB Application, so for this post, I am going to use MATLAB Application and not GUIDE, as MATLAB Application has lots of instrumentation widgets available.
The Connection diagram for connecting Servo Motor to Arduino is very simple and is as follows:
 |
| Connection Diagram |
Servo Motor comes with three pins and the following diagram will help you identify the proper connections for your servo motor.
 |
| Servo Wiring |
The Servo Motor which I am using can rotate from 0 degrees to 180 degrees, MATLAB Application will send these values to the serial port, based on the knob position selected by the user and Arduino Program will in-turn rotates the servo motor to the desired position.
 |
| MATLAB Application |
#include <Servo.h>
#define SERVO_PIN 8u
Servo myServo;
void setup()
{
Serial.begin(9600);
myServo.attach(SERVO_PIN);
delay(15);
myServo.write(0);
delay(15);
}
void loop()
{
if( Serial.available() )
{
uint8_t value = Serial.read();
// Serial.write(value);
myServo.write(value);
delay(15);
}
}
Have a look at this video to view the complete demo.
The Snapshots of the demo are as follows:
 |
| 180 Degrees |
 |
| 110 Degrees |
 |
| 30 Degrees |


and if I want to add two more servos? what can i do?
ReplyDelete