Hello Everyone, in the last post I have shown you how to update your ESP8266 firmware and I have also shown you guys some of the important AT commands related to ESP8266 firmware which works with the new/latest firmware.
In today's post, I will share my Weather Station software with you guys, with which you can easily communicate with your ESP8266 WiFi Module with Arduino and do the following things with the module.
- Check whether the module is connected and working properly.
- Connect to a Network (Need SSID and Password)
- Get the MAC Address of the WiFi Module
- Get the Assigned IP Address to the module
- Connect with "OpenWeather" website
- Get temperature, real feel temperature, minimum temperature, and maximum temperature of any city and display this information on OLED display
OR
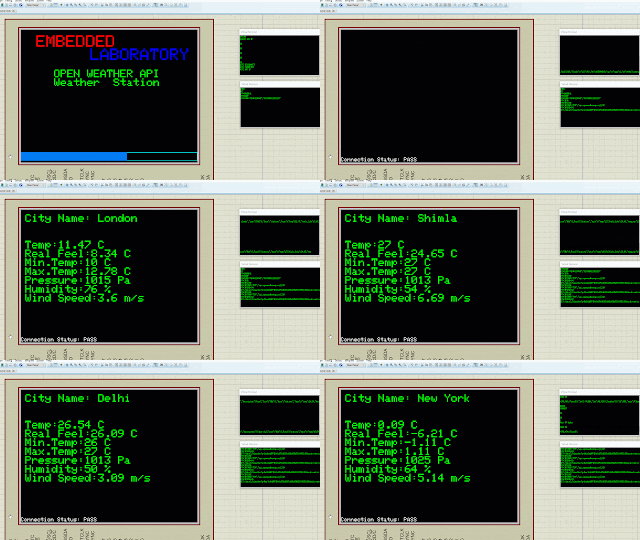
- Get temperature, real feel temperature, minimum temperature, maximum temperature, pressure, humidity and wind speed of any city and display this information on TFT display.
So, there are two projects, in one display is OLED and in another one display in TFT (ILI9341) based.
Instead of using an actual Arduino, I am using Arduino Simulation Module in Proteus software, while the ESP8266 module is real, and is connected to my Laptop, and Proteus can access it using COMPIM.
 |
| Weather Station Simulation (TFT Based) |
 |
| Weather Station Simulation (OLED Based) |
OLED Based
The following are the software libraries needed for this project.
- Standard Arduino Libraries
- OLED_I2C Library from Rinky-Dink Electronics
Download the code from the GitHub Repository. This consist of software and simulation file.
ILI9341 TFT Based
The following are the software libraries needed for this project.
- Standard Arduino Libraries
- Adafruit GFX Library
- Adafruit ILI9341 Library
Download the code from the GitHub Repository. This consist of software and simulation file.
The Software Flow is as below, I will try to prepare a diagram to help in understanding in a better way, but for now, I am writing the text description.
- At Power-Up SW initializes the OLED/TFT Library and Serial Communication.
- Note: BaudRate of the module is changed to 9600 from 115200 because Proteus COMPIM doesn't support higher baud rates.
- Here the ESP8266 module is connected to the main Arduino UART, you can change it to your choice and update the SW accordingly.
- OLED/TFT is cleared and some default information is displayed.
- Arduino sends the "echo off" command to the module, this is done to prevent turning off the echoing of the characters transmitted by Arduino.
- Arduino sends the "AT" command and checks for the **OK** response, if the response comes from the module, then SW will move further, else it will stay in the same state retrying until the valid response comes from the ESP8266 module.
- Arduino sends the command to change the mode to "Station Mode", here also the response from the module is checked, and if valid SW will move further else remain in the same state.
- Arduino will then send the command to join with the access point, and if connected SW will move further, else it will keep on retrying.
- Arduino will now send the command to get the assigned IP address and MAC address of the module, and if the response is valid, Arduino SW will display this information on the OLED/TFT screen. Till this stage, our setup and initialization of the module are done.
- Now here comes the repetitive part, where we get the data of one city and display it on the OLED/TFT, and then move to the next city.
- Arduino SW will connect with the "open weather" server, and once the connection is successful it will proceed further else keeps on retrying.
- Now Arduino SW will send the number of bytes command followed by the "GET" request for the selected city.
- Arduino will receive the data from the ESP8266 module, parse it, and display it on the OLED/TFT screen if it is valid.
Other Important Topics related to this topic.


No comments:
Post a Comment